
It’s no secret I love sourdough – I mean, who doesn’t love sourdough? And once you go sourdough, you don’t go back. Store bought bread, or even store bought sourdough just doesn’t cut it. Thankfully, sourdough freezes so nicely, so you can stock up in case you ever need some extra in a pinch. If you are just getting started on the sourdough journey, check out my Sourdough for Beginners post that will tell you everything you need to know.
As my family’s love for sourdough intensified, we started playing around with sourdough pizzas, pancakes, cookies, tortillas, and more. Some extra sourdough magic shined through when we started making our own bagels. When it came to bagels, I was inspired by Little Spoon Farm, so please check out all their sourdough magic. This is my simplified version of the process!
When it comes to the bagels, the dough making process requires less time than making a loaf of sourdough, because there are no stretch and folds; however, the baking process is a bit more intensive, as it requires individual bagel forming, and boiling, before baking! So, I recommend this recipe when you have a bit more time on “day 2.”
Some Kitchen Tools You Need:
- Mason Jar (with Starter)
- None metal spatula (for stirring Starter)
- Food scale
- Plastic wrap, or a reusable version! [or these amazing stainless steel bowls with lids – medium size for making, large size for storing]
- Baking sheet(s)
- Parchment paper
- Large pot
- Tongs or Spider Strainer
Food Items You Need:
- Sourdough Starter
- Unbleached (white) flour [ideally, 100% Canadian wheat]
- Room temperature water (purified)
- Olive oil
- Pink Himalayan salt
- Raw honey
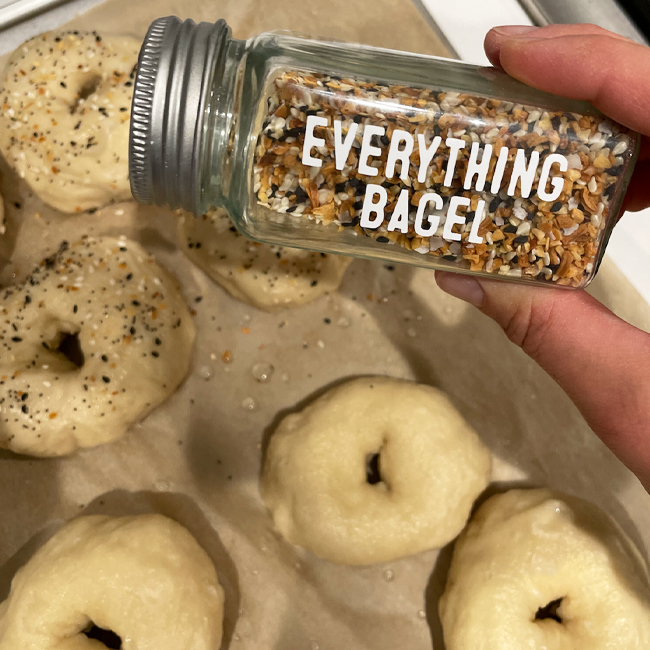
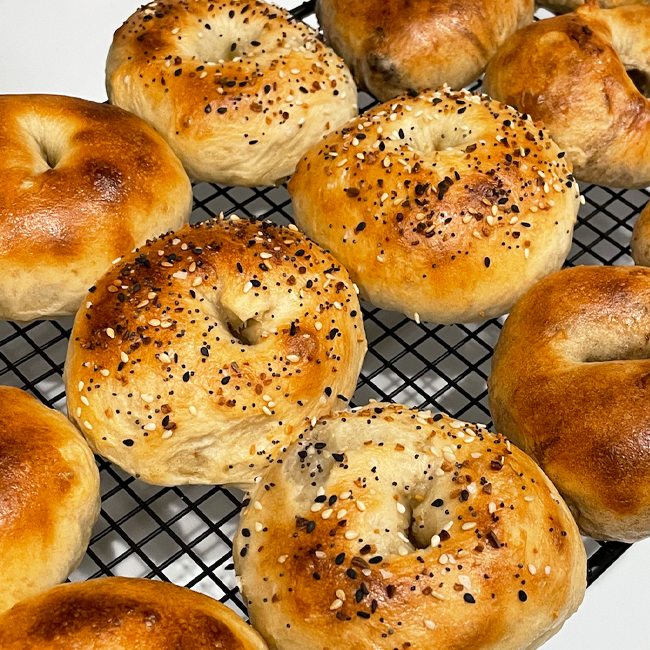
- Toppings: Everything But the Bagel Spice, Sesame Seeds, Poppy Seeds, Cinnamon and Brown Sugar, etc. (optional)
Sourdough Starter
If you’re at this point and you’re wondering what Sourdough Starter is, please refer back to the Sourdough for Beginners post.
Sourdough Recipe
Day 1: 12pm – Feed the Starter
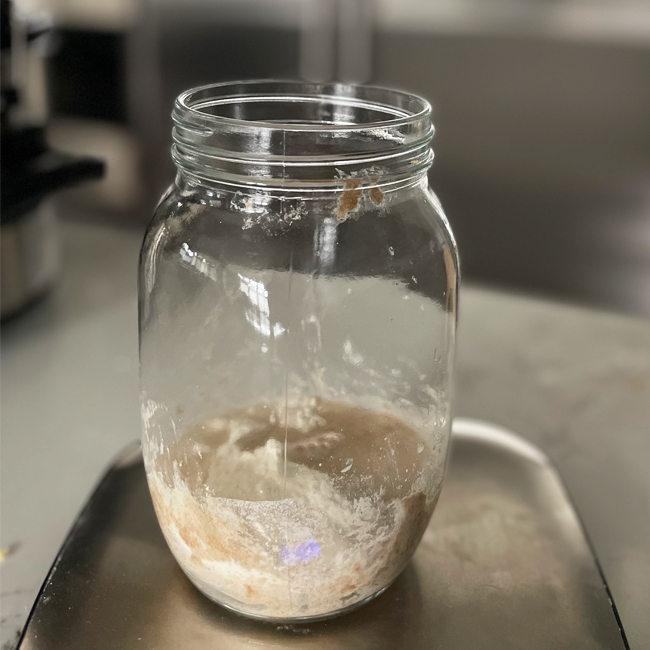
It does not need to be 12pm, but the next step has to be 6-8 hours later, and the final step needs to be 10-14 hours after that, so I’ve found that this is the best time that works for me.
- Place mason jar starter on scale and add equal portions (by weight) of unbleached flour and room temperature water. Add about 70g of each, because we want to end up with 100g of active starter to use. Stir with a none metal spatula until combined. Let starter sit, slightly covered (just enough to keep bugs out, but enough to still allow air in, so it can “breathe”), on the counter for 6-8 hours.
Day 1: 6-8pm – Make the Dough
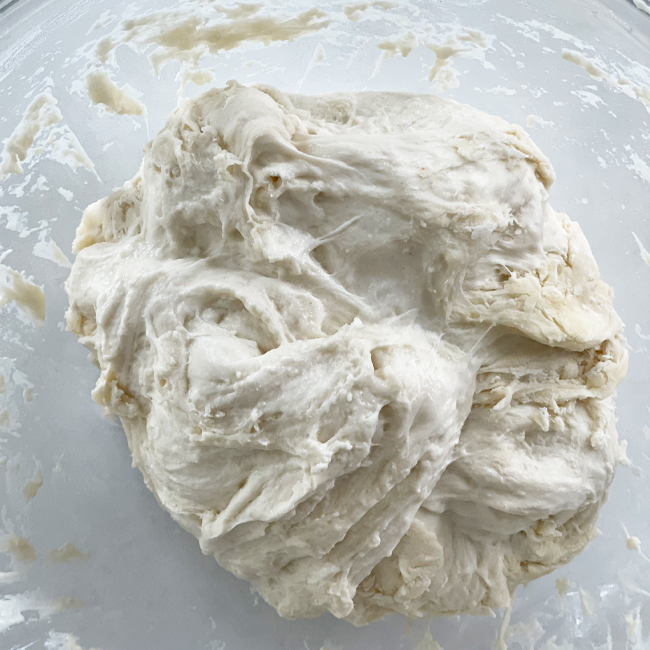
I usually do this step around 5:30pm as we are making/eating dinner. You just want it to be 6-8 hours after feeding the starter, so the starter stays active.
Dough Ingredients
- 100g starter (stir prior)
- 255g purified water (room temperature)
- 40g raw honey
- 500g unbleached (white) flour
- 10g pink Himalayan salt
Directions
- In a large bowl [this medium size stainless steel bowl is my favourite], stir 100g starter with 255g water until cloudy (looks like milk).
- Add honey, flour, and salt. Mix – I like to mix by hand just until it’s all well combined. It will be chunky and sticky and this dough feels more stiff than the loaf recipe.
- Cover with plastic wrap or beeswax wrap [or the lid of this bowl], and a dish towel if your kitchen runs cool, and let it rest for 10-14 hours.
Day 2: 7am-ish – Bagel-Making Time!
Now it’s time to the make the bagels, which is ideally 10-14 hours after you made the dough.
Directions
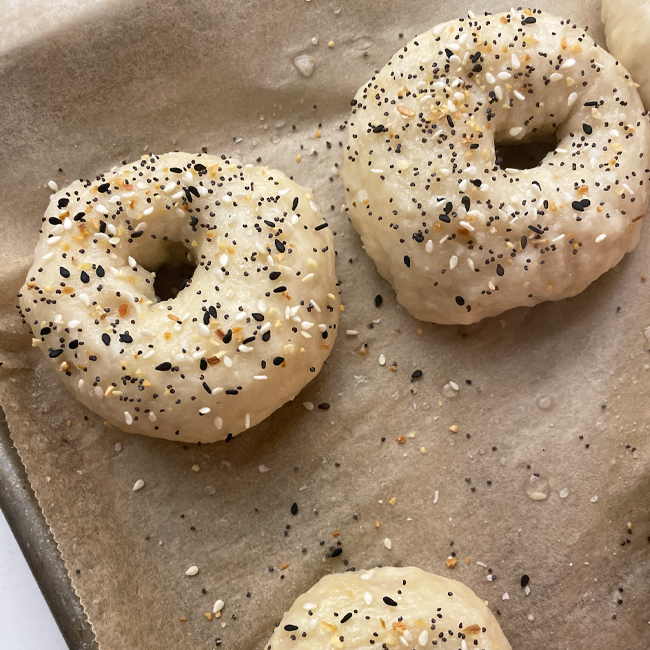
- Line a baking sheet with parchment paper. Then divide the dough into 8 balls – I use a little additional flour to form each ball. Poke a hole in each ball with your thumb to form the bagels – continue to “roll” the outsides of the bagels if you need to form or smooth them anymore. Place each one on the baking sheet with space in between each one. Cover the bagels with a kitchen towel for about 30 minutes.
- While you are letting the bagels rise, preheat the oven to 425 degrees Fahrenheit. Fill a large pot with water and bring to a boil.
- Using tongs or a spider strainer, place 2-3 bagels into the boiling water, allowing them to boil on each side for about a minute. Once they have boiled on each side, use the tongs or spider strainer to place them back on the parchment paper. Repeat the process until all the bagels have been boiled. [If you are going to add bagel toppings, now is the time! Some examples are: Everything But the Bagel Spice, Poppy Seeds, Sesame Seeds, Cinnamon and Brown Sugar, or endless other possibilities!].
- Bake the bagels at 425 degrees Fahrenheit for about 20 minutes, or until desired golden brown colour.
- Let cool and enjoy! These will last about a week (if they aren’t devoured before then), or they freeze perfectly!
Let’s end here with a joke, because my kids love them…
What do you call a bagel that can fly?
A plain bagel!