
From my time teaching Preschool Music, I have learned and come up with many DIY musical crafts to get the kids interacting with different instruments. The great thing about these crafts is that most of them are made from things that you would find in your own house, or craft cabinet (if you have one…if not, hit up the dollar store!); Many of the materials would be recycled, but are now given a new life!
Depending on your child’s age and level, you’ll know how much of the instrument creation they can do, and how much you’ll need to assist them with, but overall, try make the creation of the instrument an activity in itself, even if it’s just the decorating!!

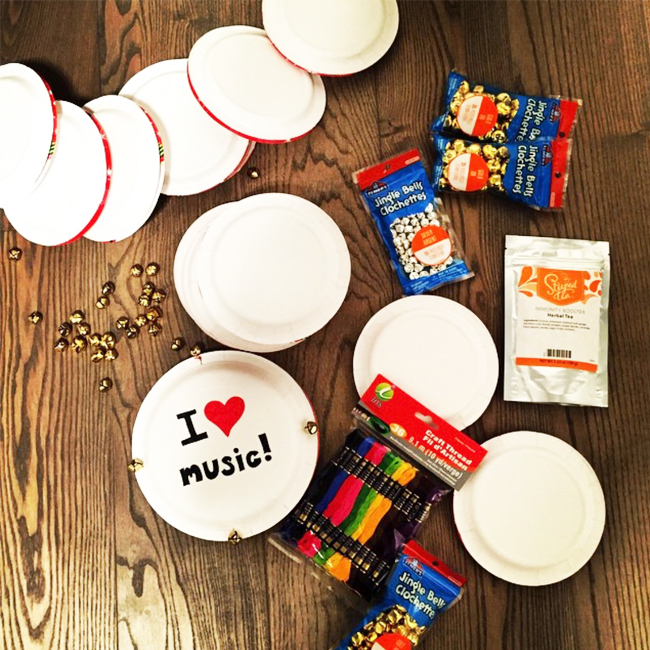
What You’ll Need:
- 2 Paper Plates (small or large)
- Scotch Tape
- Pen
- Thread or String
- Scissors
- 4 Jingle Bells
- Stickers and/or Markers
Instructions:
- Put two paper plates together, so that the base of the paper plates are facing out. Add 4 pieces of scotch tape on the outer edges to hold the plates together, in a square formation.
- In between each piece of tape, take a pen and poke a hole through the paper plate’s edges (you will now end up with 4 holes in a square formation).
- Cut the thread or string into pieces (long enough to fit through the plates and jingle bell and still easy enough to tie into a triple knot).
- Using the pen, help thread the thread/string through a hole. Add a jingle bell to the string, and then triple knot. Feel free to cut off any additional thread after knotting.
- Repeat Step 4 until all four holes have a jingle bell.
- Decorate the tambourine with stickers, markers, or whatever you can think of. Then your tambourine is ready to make music with!!
With my preschoolers, we always love to march around the room keeping a steady beat with our tambourines. Have fun making music!